Streamlining Image Annotation with Annotate-Lab
Image annotation is the process of adding labels or descriptions to images to provide context for computer vision models. This task involves tagging an image with information that helps a machine understand its content. Annotation is crucial in applications such as self-driving cars, medical image analysis, and satellite imagery analysis.
Annotated images are used to train computer vision models for tasks like object detection, image recognition, and image classification. By providing labels for objects within images, the model learns to identify those objects in new, unseen images.
Types of Image Annotation
Image Classification
In image classification, the goal is to categorize the entire image based on its content. Annotators label each image with a single category or a few relevant categories to support this task.
Image Segmentation
Image segmentation aims to understand the image at the pixel level, identifying different objects and their boundaries. Annotators assign a label to each pixel in the image, grouping similar pixels together to support semantic segmentation. In instance segmentation, each individual object is distinguished.
Object Detection
Object detection focuses on identifying and locating individual objects within an image. Annotators draw a box around each object and assign a label describing it. These labeled images act as ground truth data. The more precise the annotations, the more accurate the models become at distinguishing objects, segmenting images, and classifying image content.
Introducing Annotate-Lab
Let's explore Annotate-Lab, an open-source image annotation tool designed to streamline the image annotation process. This user-friendly tool boasts a React-based interface for smooth labeling and a Flask-powered backend for data persistence and image generation.
Installation and Setup
To install Annotate-Lab, you can clone the repository or download the project from GitHub: Annotate-Lab GitHub Repository. You can then run the client and server separately as mentioned in the documentation or use Docker Compose.
Configuration
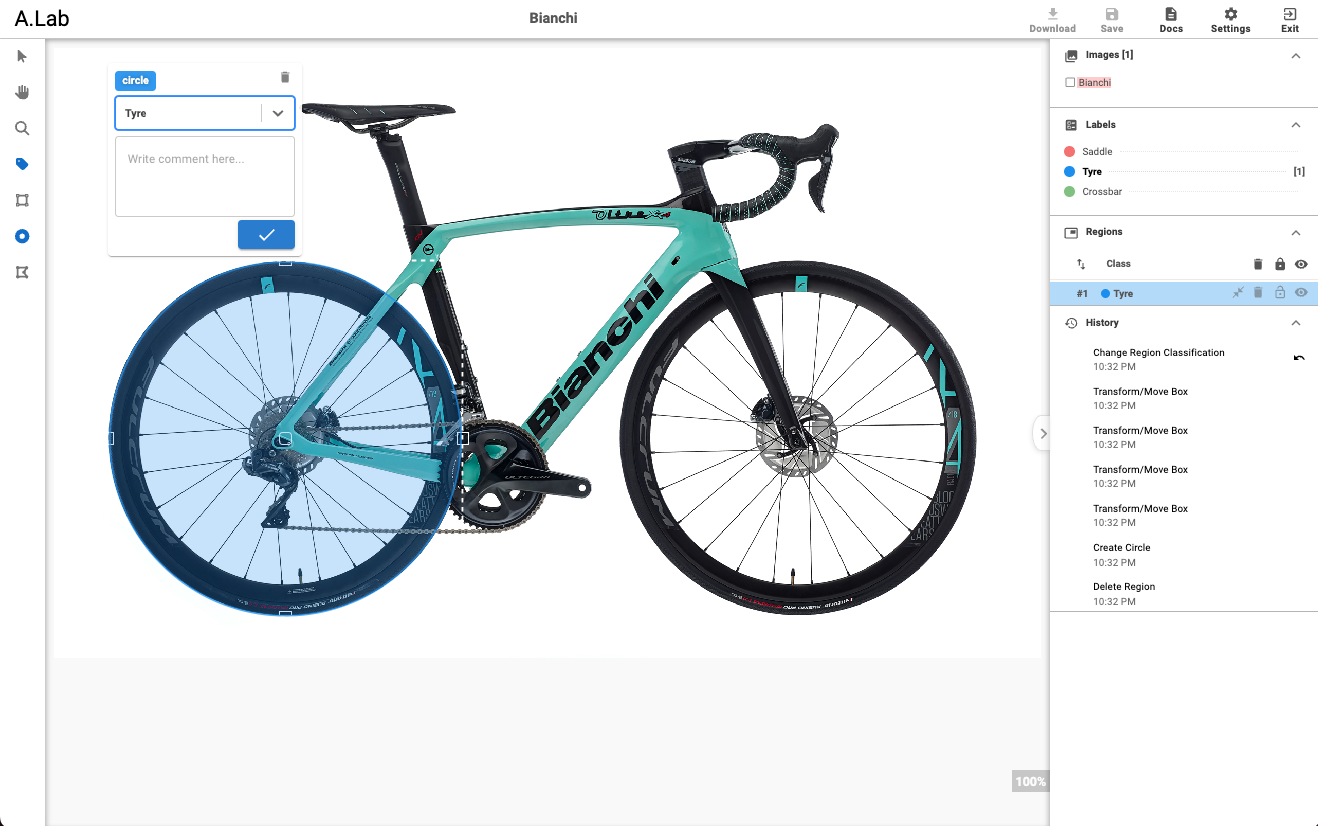
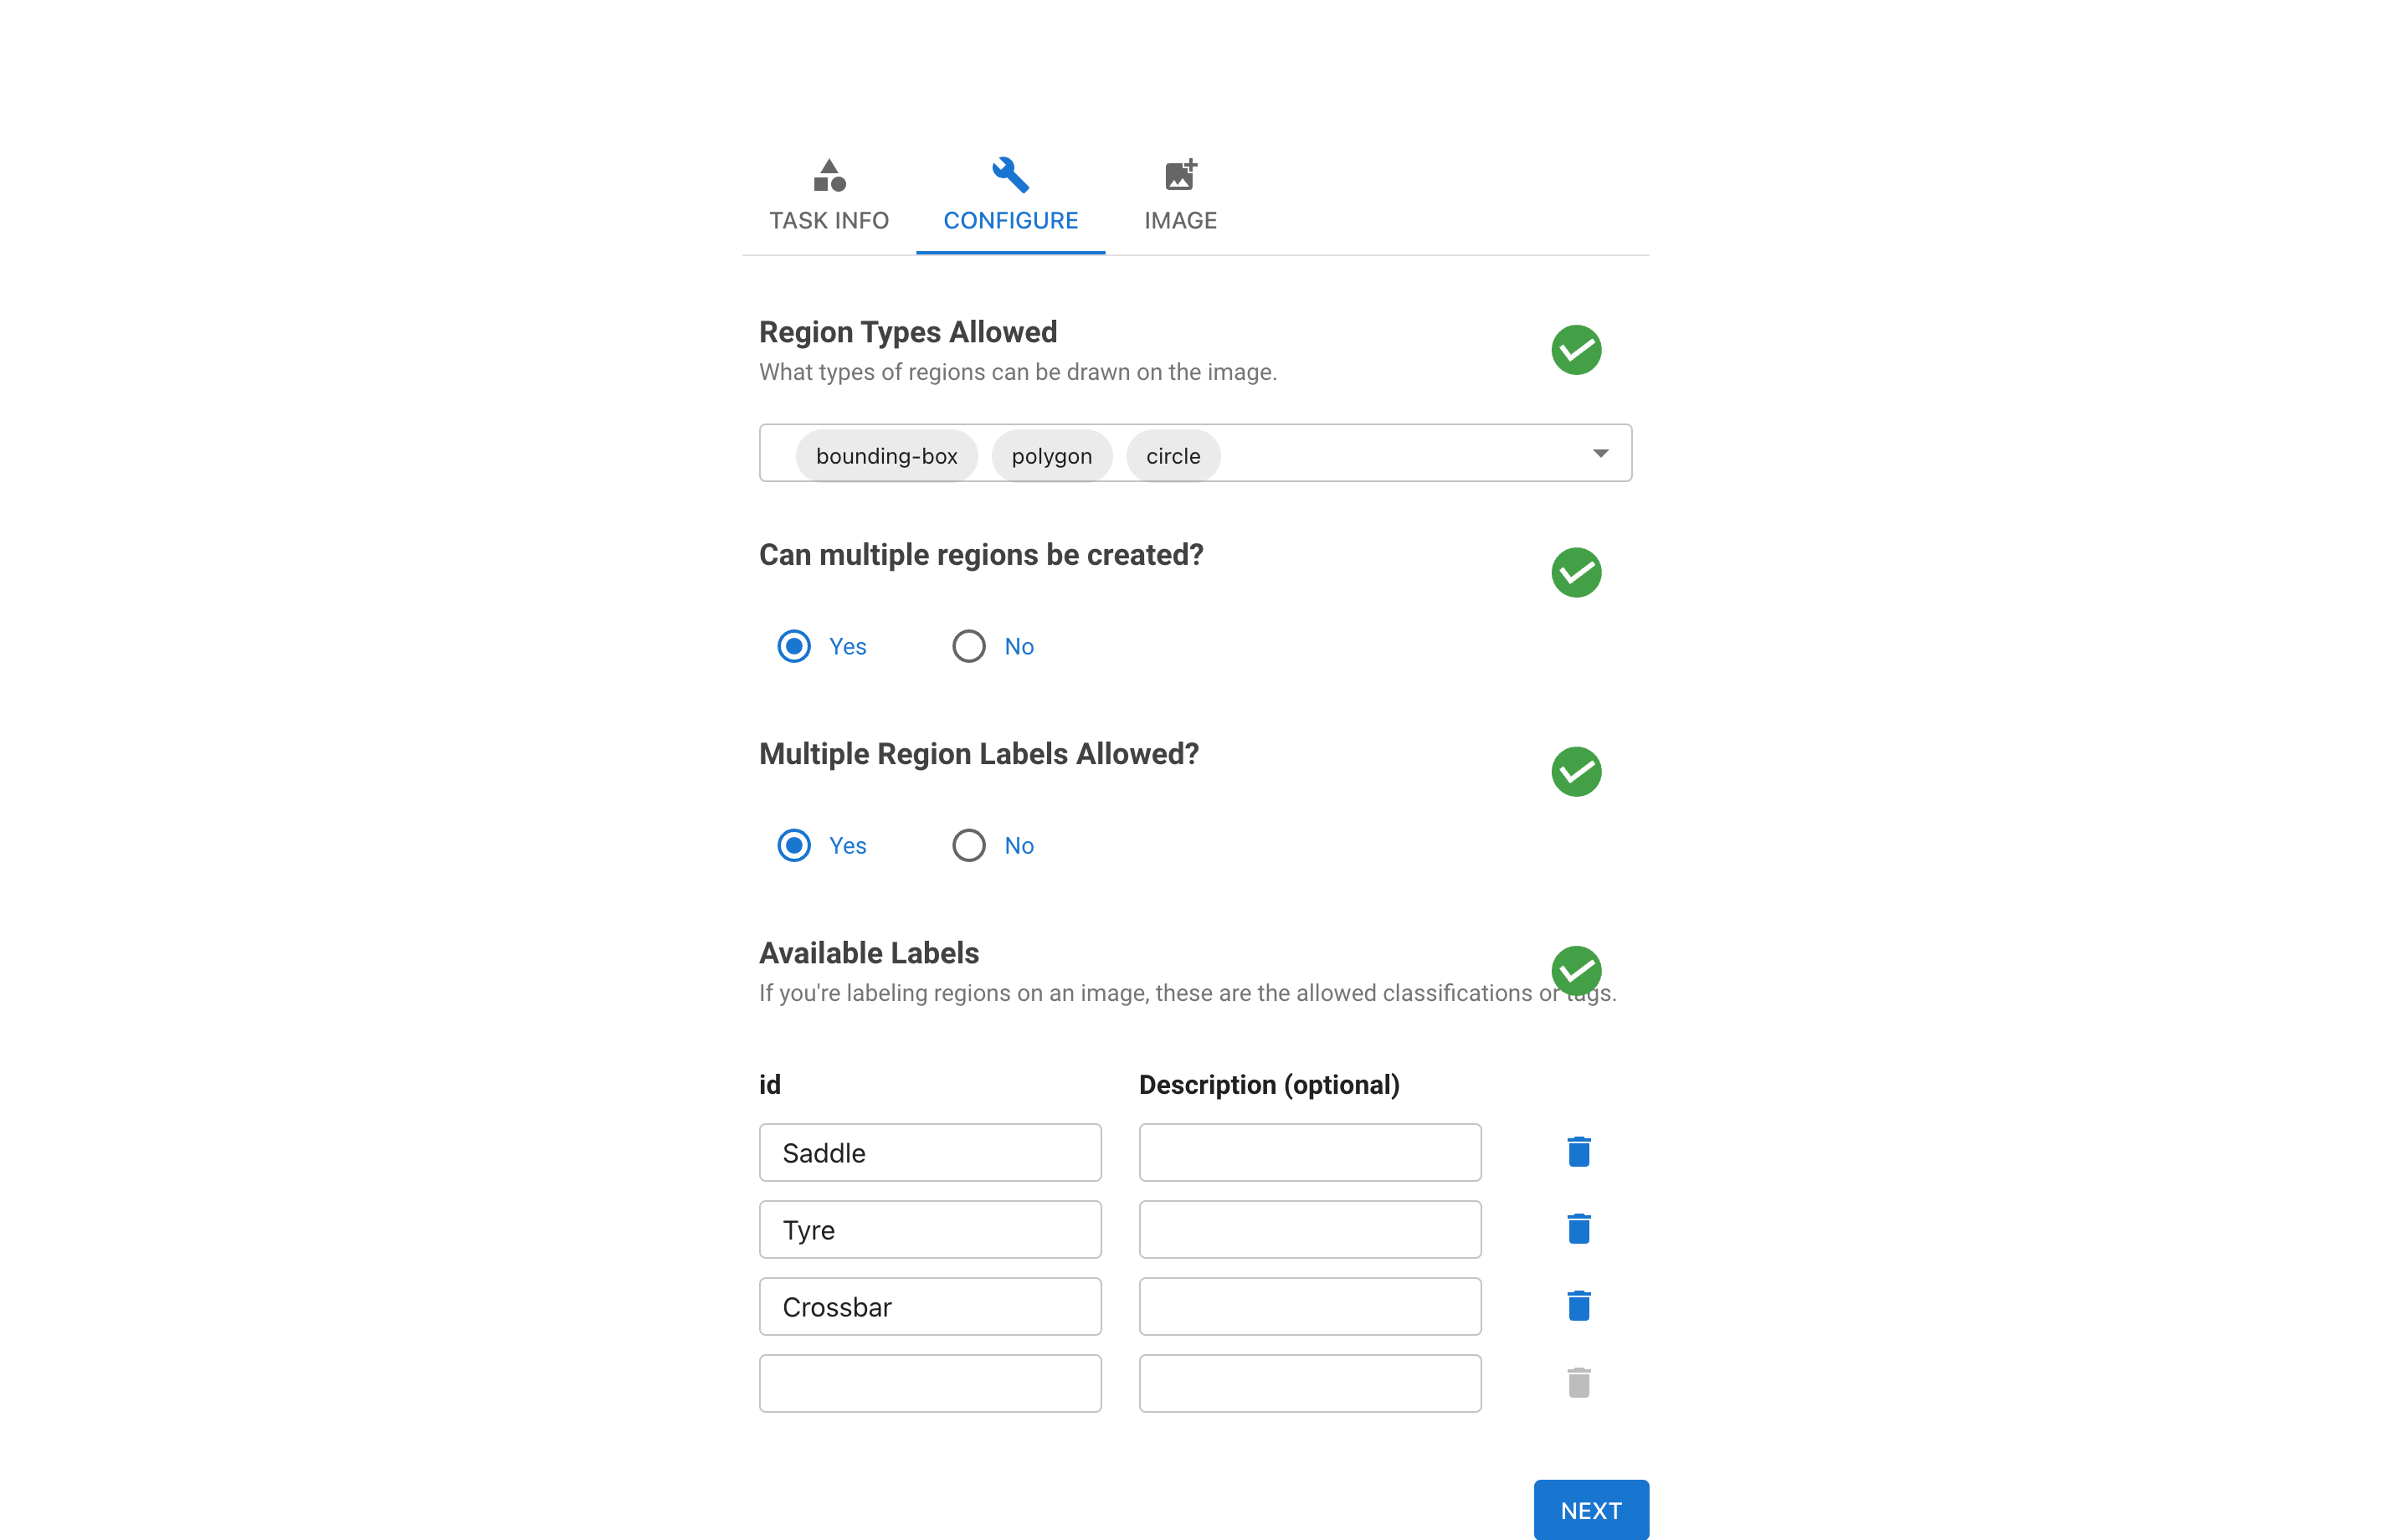
After starting the application, the configuration screen appears. Here, you can provide information such as labels, selection tools, and images, along with other configuration options. Below are the screenshots of the configuration screens.
Annotation Interface
Once configured, the annotation screen appears. At the top, users will find details about the uploaded image, along with a download button on the right side, enabling them to download the annotated image, its settings, and the masked image. The "prev" and "next" buttons navigate through the uploaded images, while the clone button replicates the repository. To preserve their current work, users can use the save button. The exit button allows users to exit the application.
Tools and Features
The left sidebar contains a set of tools available for annotation, sourced from the initial configuration. Default tools include "Select," "Drag/Pan," and "Zoom In/Out".
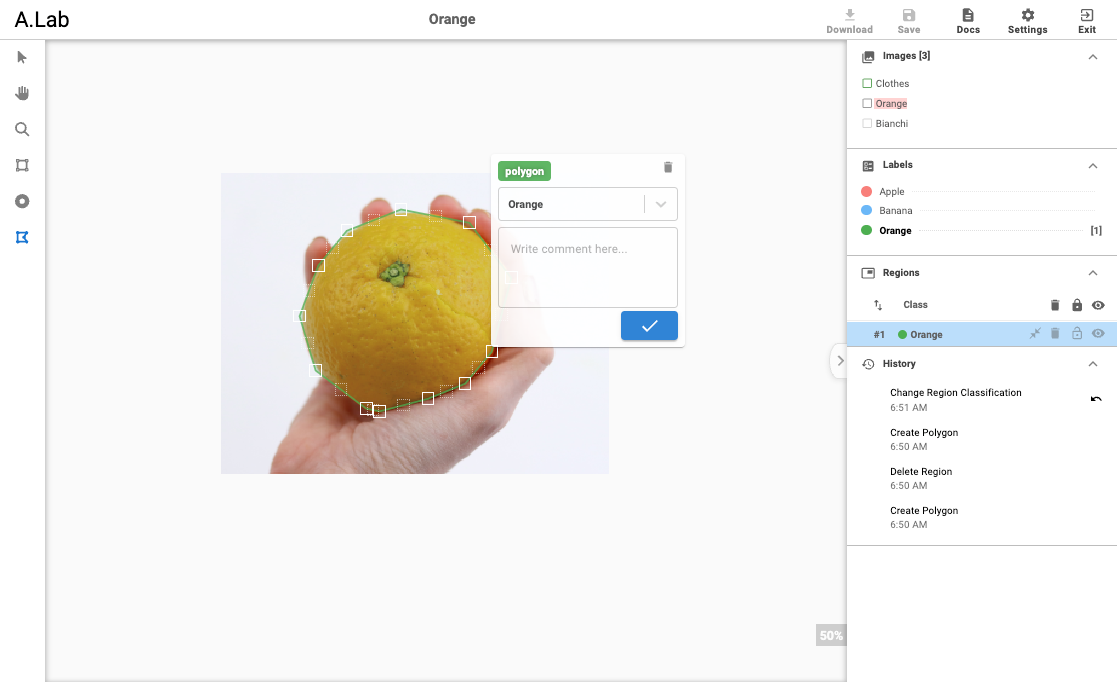
The right sidebar is divided into four sections: files, labels, regions, and history. The files section lists the uploaded images and allows users to navigate and save current stage changes. The labels section contains a list of labels, enabling users to select their desired label to apply it to the annotated region. The regions section lists annotated regions, where users can delete, lock, or hide selected regions. The history section shows action histories and offers a revert functionality to undo changes.
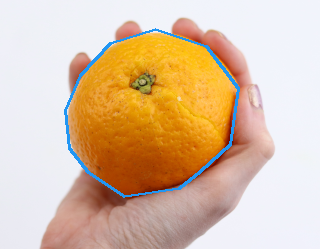
Between the left and right sidebars, there's a workspace section where the actual annotation takes place. Below is a sample of an annotated image along with its mask and settings.

{
    "orange.png": {
        "configuration": [
            {
                "image-name": "orange.png",
                "regions": [
                    {
                        "region-id": "30668666206333817",
                        "image-src": "http://127.0.0.1:5000/uploads/orange.png",
                        "class": "Apple",
                        "comment": "",
                        "tags": "",
                        "rx": [
                            0.30205315415027656
                        ],
                        "ry": [
                            0.20035083987345423
                        ],
                        "rw": [
                            0.4382024913093858
                        ],
                        "rh": [
                            0.5260718424101969
                        ]
                    }
                ],
                "color-map": {
                    "Apple": [
                        244,
                        67,
                        54
                    ],
                    "Banana": [
                        33,
                        150,
                        243
                    ],
                    "Orange": [
                        76,
                        175,
                        80
                    ]
                }
            }
        ]
    }
}
Demo Video
An example of orange annotation is demonstrated in the video below.
YOLO Format
YOLO format is also supported by A.Lab. Below is an example of annotated ripe and unripe tomatoes. In this example, 0 represents ripe tomatoes and 1 represents unripe ones.
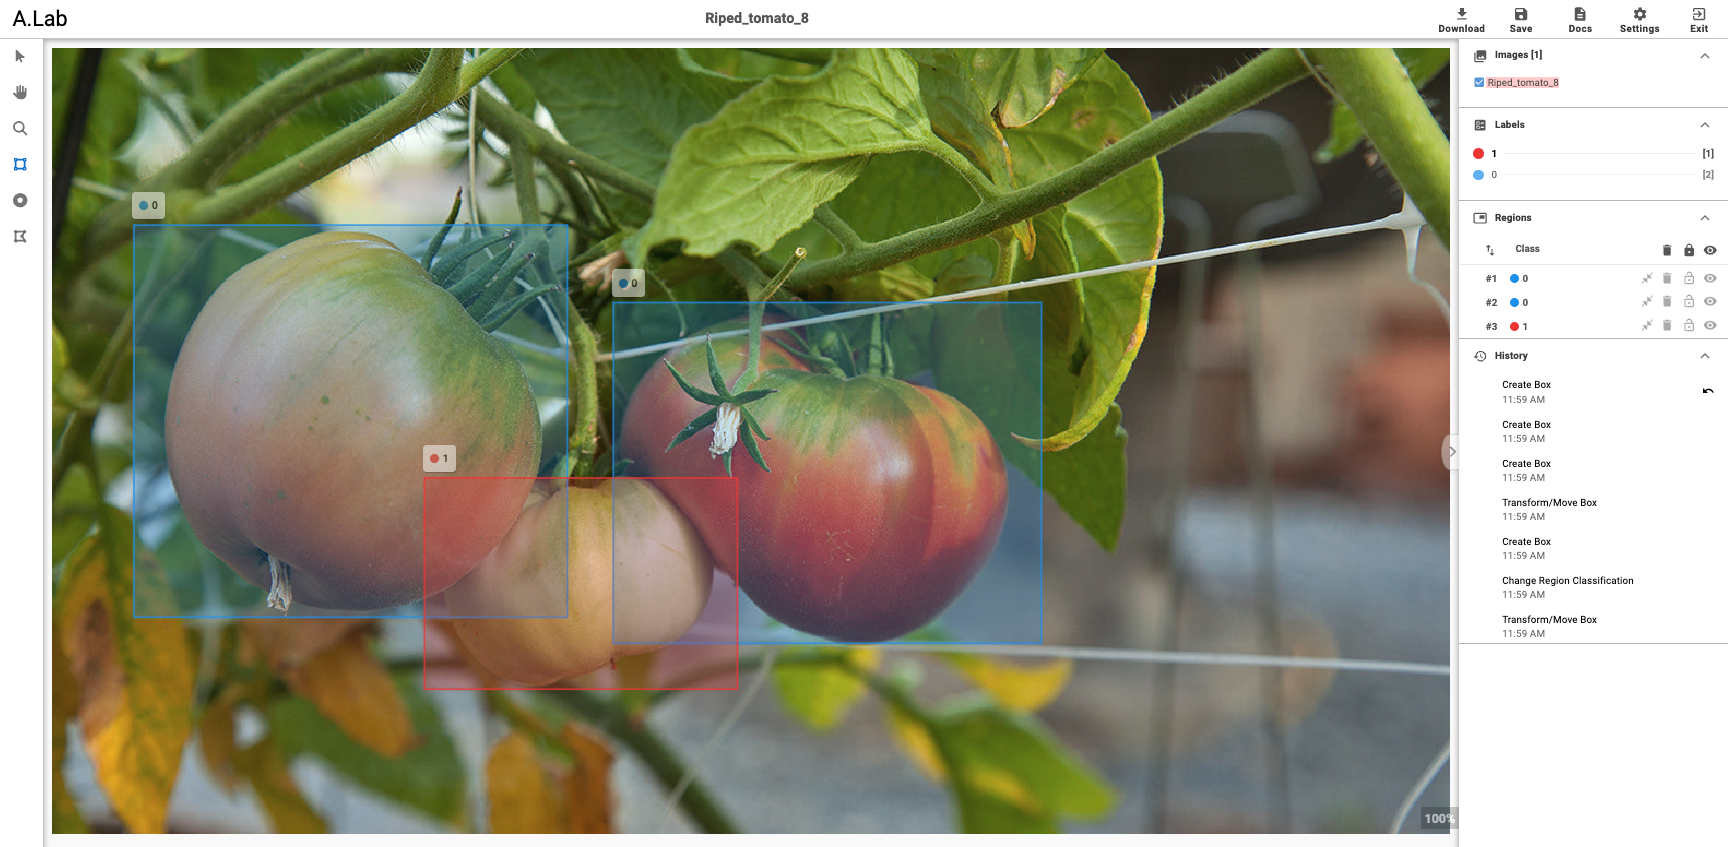
The label of the above image are as follows:
0 0.213673 0.474717 0.310212 0.498856
0 0.554777 0.540507 0.306350 0.433638
1 0.378432 0.681239 0.223970 0.268879
Applying the generated labels we get following results.

Conclusion
By providing a streamlined, user-friendly interface, Annotate-Lab simplifies the process of image annotation, making it accessible to a wider range of users and enhancing the accuracy and efficiency of computer vision model training.
Published : Jun 24, 2024
Open Source
Computer Vision
Machine Learning
Image Annotation
